Access Microsoft Graph API using SFPX with Secured Azure Function

As we know, SPFx runs in the context of logged In user. In a scenario where your application needs to perform some tasks which require more permissions then currently logged In user, you can use this approach to handle those scenarios.
For example, You can configure Azure AD app with elevated Microsoft Graph API permissions and then call Microsoft Graph API from Azure Function.

Here are high-level steps

  • Create a self-signed certificate
  • Create an Azure AD app and add required Microsoft Graph API permissions
  • Create and Configure Azure Key Vault
  • Create an Azure Function
  • Calling an Azure Function from SPFx

Create a Self-Signed Certificate

There is a PnP PowerShell command New-PnPAzureCertificate which can be used to Generate a new 2048bit self-signed certificate and manifest settings for use in Azure AD App.

👉 Here is a script which can generate a self-signed certificate and manifest settings.

$Password = ""
[SecureString]$securePassword = ConvertTo-SecureString $Password -AsPlainText -Force
#Create self signed ceritificate
$cert = New-PnPAzureCertificate -CommonName "GraphAPISPFx" -ValidYears 50 -CertificatePassword $securePassword -Country "UK" -State "Essex" -OutPfx "GraphAPISPFx.pfx" -OutCert "GraphAPISPFx.cer"
#Get Certificate Key Crendentials
$cert.KeyCredentials

When you run the above script, Following certificate files will be generated.

  • GraphAPISPFx.pfx
  • GraphAPISPFx.cer

Create and Configure Azure AD App

  1. Create an Azure AD App

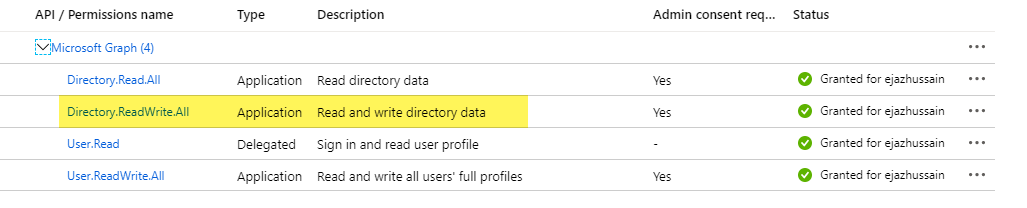
  2. Under API Permissions, Add application permissions for Microsoft Graph API and give admin consent.

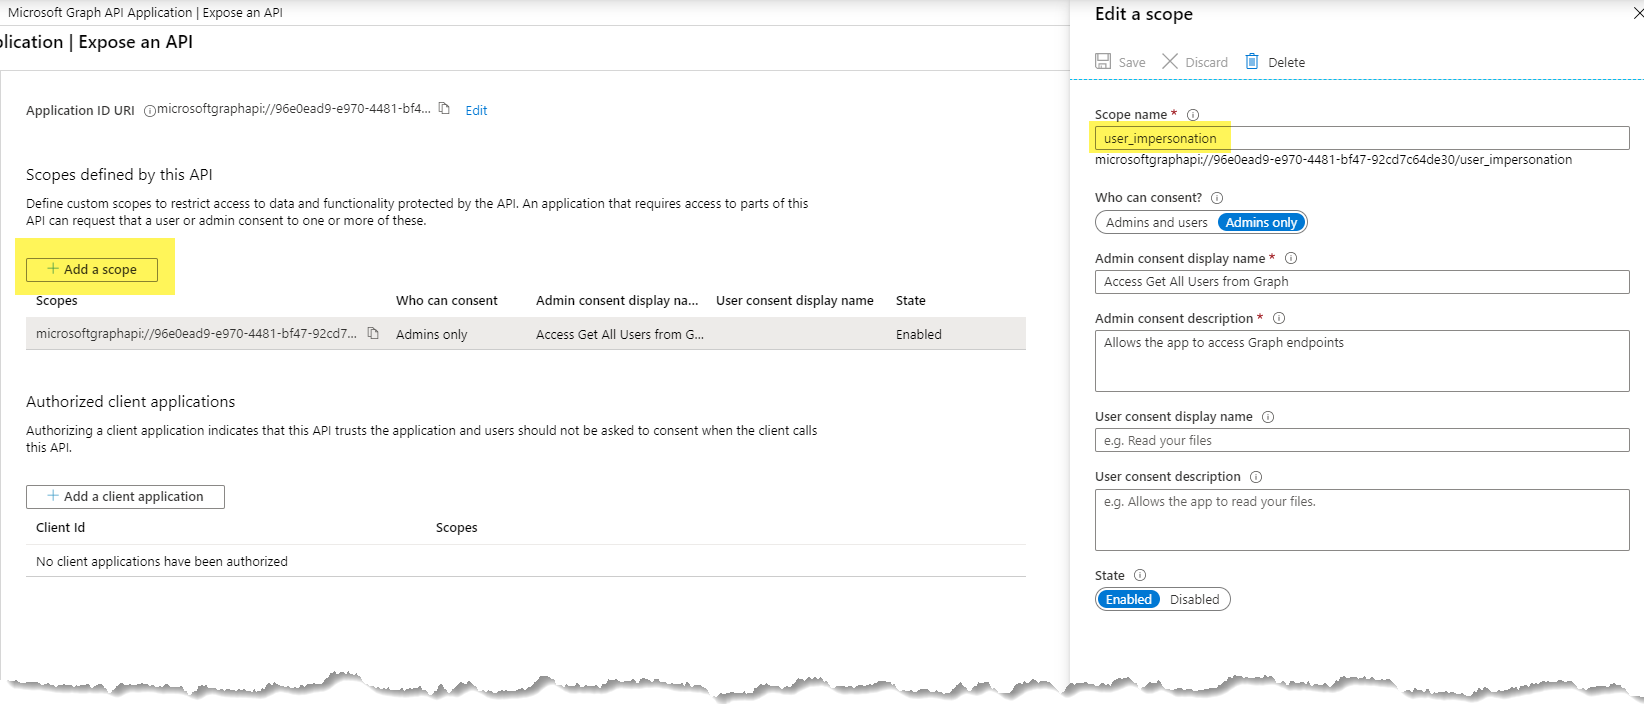
  3. Under Expose an API, Add user_impersonation scope.

  4. Under Certificates & secrets, Upload the certificate AccessGraphAPISPFx.cer file created in previous step.

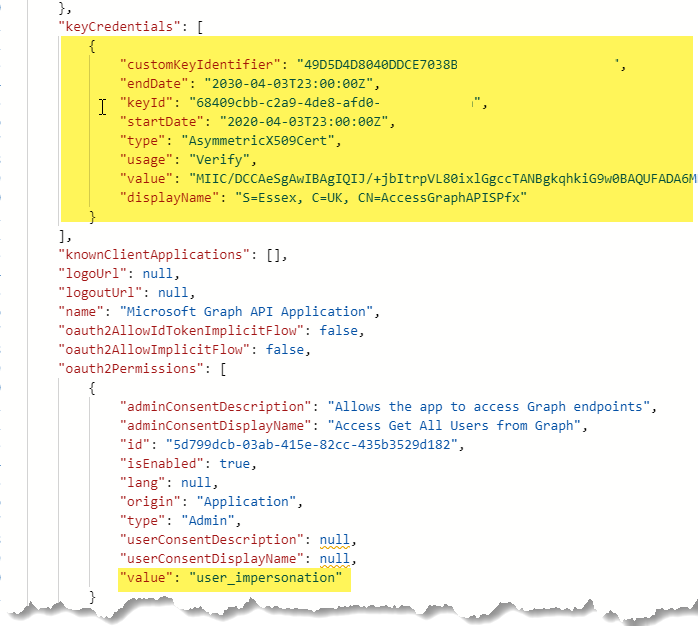
  5. Once you uploaded the above certificate and added a new user_impersonation scope, App manifest file will automatically be updated in the background. See below KeyCredentials and user_impersonation sections

Create and Configure Azure Key Vault

We are going to use Azure Key Vault to save our certificate so that we can retrieve this from Azure Function to get authentication provider for calling Microsoft Graph API.

  1. Create an Azure Key Vault
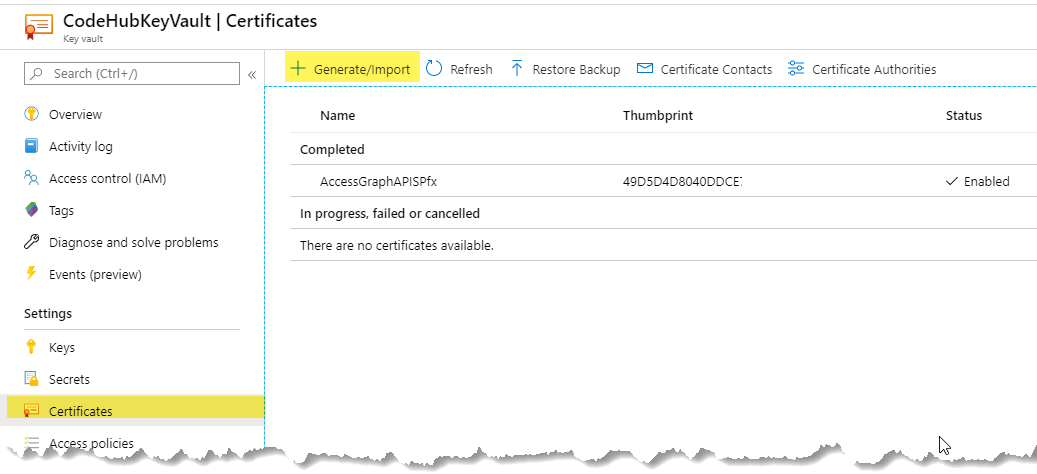
  2. Import your certificate in an azure key vault
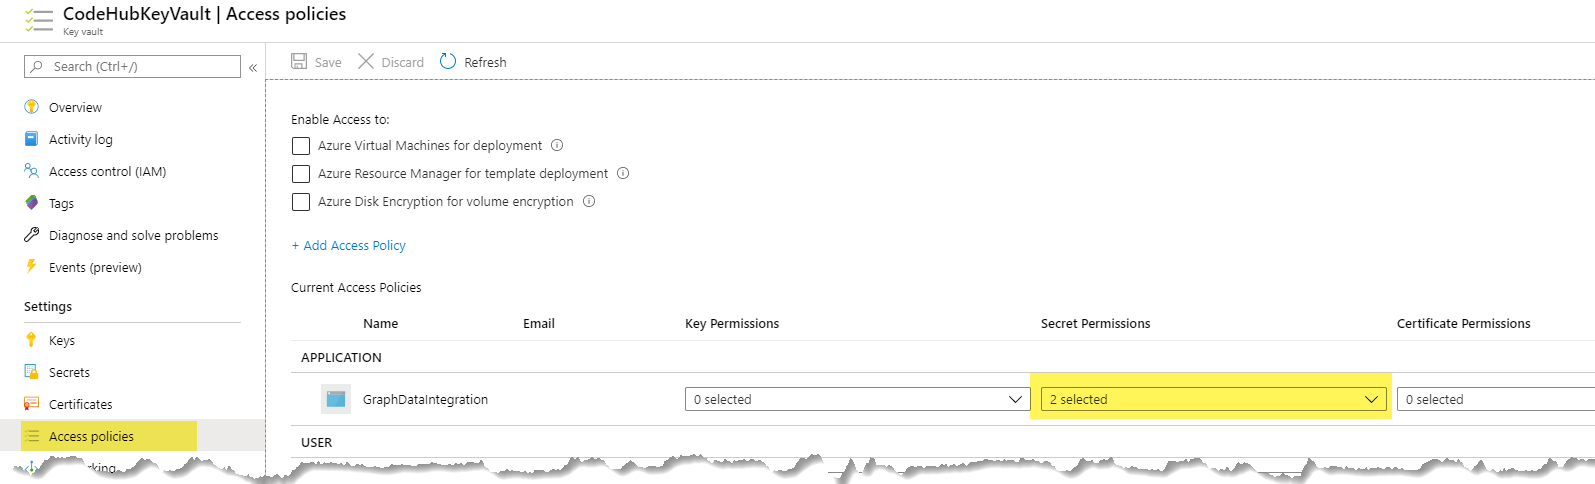
  3. The last step is to add access policy for following Azure Function and give appropriate permissions (Get and List permission should be sufficient) to retrieve secrets. This step should perform after you have created an Azure function and enable Managed Service Identity.

Create an Azure Function

Create an Azure Function which is going to retrieve a list of users using Microsoft Graph API. Technically at this stage, you can call any Microsoft Graph API endpoints as long as you have appropriate permissions granted in Azure Ad App. But for simplicity, I am going to just retrieve all users in my organization.

Here are list tasks we are going to perform in Azure Function

  1. Create an Azure Function

  2. Retrieve certificate from Azure Key Vault via Managed Service Identity

  3. We are going to use Microsoft Authentication Library (MSAL) client credential authentication provider using a certificate. There are two different ways to get an authentication provider using Microsoft Authentication Library (MSAL).

    • using Microsoft.Identity.Client OR
    • using Microsoft.Graph.Auth. Microsoft Graph Auth library provides a wrapper for Microsoft Authentication Library (MSAL). We are going to use this approach here.
  4. Here is code which retrieves the certificate from an Azure key vault and then gets Authentication Provider to call Microsoft Graph API

    public static async Task<IActionResult> Run(
    [HttpTrigger(AuthorizationLevel.Anonymous, "get", "post", Route = null)] HttpRequest req,
    ILogger log)
    {
    log.LogInformation("GetAllUsersKeyVaultCertificateAuth : processing a request...");
    try
    {
    //Get certificate from Azure Vault
    X509Certificate2 certificate = await KeyVaultHelper.RetrieveCertificate("AccessGraphAPISPfx");
    //Get Authentication Provider baesd on Certificate
    var authenticationProvider = AuthHelper.GetClientCrendentialAuthProviderWithCertificate(certificate);
    var graphClient = new GraphServiceClient(authenticationProvider);
    var allUsers = await graphClient.Users
    .Request()
    .GetAsync();
    return allUsers != null
    ? (ActionResult)new OkObjectResult(allUsers)
    : new BadRequestObjectResult("Unable to reterive users");
    }
    catch (Exception ex)
    {
    log.LogError("GetAllUsersKeyVaultWithCertificate Faild with Error: " + ex.Message);
    return null;
    }
    }

  5. Retrieve certificate from Azure Vault

    public static async Task<X509Certificate2> RetrieveCertificate(string name)
    {
    var serviceTokenProvider = new AzureServiceTokenProvider();
    var keyVaultClient = new KeyVaultClient(new KeyVaultClient.AuthenticationCallback(serviceTokenProvider.KeyVaultTokenCallback));
    var secretUri = SecretUri(name); // The Name of the secret / certificate
    SecretBundle secret;
    try
    {
    secret = await keyVaultClient.GetSecretAsync(secretUri);
    X509Certificate2 certificate = new X509Certificate2(Convert.FromBase64String(secret.Value));
    return certificate;
    }
    catch (KeyVaultErrorException kex)
    {
    return null;
    }
    }

  6. Get client credential authentication provider based on the certificate using Microsoft.Graph.Auth

    public static ClientCredentialProvider GetClientCrendentialAuthProviderWithCertificate(X509Certificate2 certificate)
    {
    // Create a client application.
    IConfidentialClientApplication confidentialClientApplication = ConfidentialClientApplicationBuilder.Create(clientId)
    .WithAuthority(AzureCloudInstance.AzurePublic, tenantId)
    .WithCertificate(certificate)
    .Build();
    // Create an authentication provider.
    ClientCredentialProvider authenticationProvider = new ClientCredentialProvider(confidentialClientApplication);
    return authenticationProvider;
    }

  7. Make sure you have to enable Managed Service Identity for your azure function and added appropriate access policy in Azure Vault as described above

Calling an Azure Function from SPFx

At this point, your Azure Function should be secured by Azure AD and ready to be called from SPFx web part.

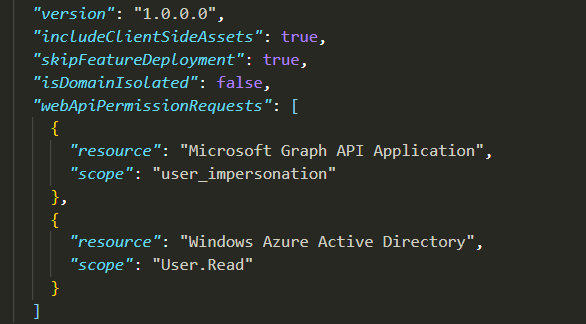
  1. Add the following permissions requests in your package-solution.json
  2. Approve above permission from SharePoint Admin Web Api Permission Management page
  3. Here is how you can get AADHttpClient using SPFx and call Microsoft Graph Api
    /////////////////////////////////////////////////////////////////////////////////////////////////////////////////////////////////
    /* Get AadHttpClient */
    /////////////////////////////////////////////////////////////////////////////////////////////////////////////////////////////////
    protected onInit(): Promise<void> {
    return new Promise<void>((resolve: () => void, reject: (error: any) => void): void => {
    this.context.aadHttpClientFactory
    .getClient('96e0ead9-e970-4481-bf47-92cd7c64de30')
    .then((client: AadHttpClient): void => {
    this.graphClient = client;
    resolve();
    }, err => reject(err));
    });
    }
    /////////////////////////////////////////////////////////////////////////////////////////////////////////////////////////////////
    /* Get All Users Component */
    /////////////////////////////////////////////////////////////////////////////////////////////////////////////////////////////////
    import * as React from 'react';
    import styles from './GetAllUsers.module.scss';
    import { IGetAllUsersProps } from './IGetAllUsersProps';
    import { escape } from '@microsoft/sp-lodash-subset';
    import { AadHttpClient, HttpClientResponse } from '@microsoft/sp-http';
    const apiUrl = "https://spfxgraphapi.azurewebsites.net/api/GetUsers";
    export interface IGetAllUsersState {
    result: any[];
    }
    export default class GetAllUsers extends React.Component<IGetAllUsersProps, IGetAllUsersState> {
    private userClient: AadHttpClient;
    /**
    *
    */
    constructor(props: IGetAllUsersProps, state: IGetAllUsersState) {
    super(props);
    this.state = {
    result: []
    };
    }
    public componentDidMount() {
    this.GetAllUsers();
    }
    private async GetAllUsers() {
    let response = await this.props.graphClient.get(apiUrl, AadHttpClient.configurations.v1);
    if (response.ok) {
    let responseJSON = await response.json();
    this.setState({result : responseJSON});
    }
    }
    public render(): React.ReactElement<IGetAllUsersProps> {
    return (
    <div className={styles.getAllUsers}>
    <div className={styles.container}>
    <div className={styles.row}>
    <div className={styles.column}>
    {this.state.result != null && this.state.result.length > 0 ? <pre>{JSON.stringify(this.state.result, null, 2)}</pre> : ""}
    </div>
    </div>
    </div>
    </div>
    );
    }
    }
Author: Ejaz Hussain
Link: https://office365clinic.com/2020/04/10/spfx-secured-azurefunction-integration/
Copyright Notice: All articles in this blog are licensed under CC BY-NC-SA 4.0 unless stating additionally.