Form customizers are SharePoint Framework components that allow you to override the form experience in a list or library level by associating the component to the used content type. Form customizer components can be used in SharePoint Online, and you build them using modern JavaScript tools and libraries.
Create lists structure
Create the list structure as described below. You can follow the steps below or download the PnP Template Customers List PnP Template to create the following structure.
- Create a Project list for lookup
- Create a content type called Customer
- Crate a Customers list and associated above Customer content type
Create Projects list
Create a Projects list with the following fields. I have not used any content type with the Projects list, but you can set it up however you want. The project list used for a lookup column Projects in the Customers listName Type Settings Title Single Line of text Status Choices In Progress, Completed, On Hold Members Person or Group StartDate DateTime
Populate the project list with some sample data. So that the projects will be available to select when we create a new item in the Customers list
Create Customer Content Type
Create a Customer content type with the following fieldsName Type Settings Title Single Line of text Email Single Line of text Address Multiple lines of text Projects Lookup Lookup to Projects list Interests Choices Decorating, Diving, Livestreaming, Drawing, Kung fu, Create Customers List
Create a Customers list and associate the Customer content type created in the above step.
At this point, you have will Customers list ready to test SPFx Form Customizer.
Create a Form Customizer extension project
Create a new extension by running the Yeoman SharePoint Generator.
yo @microsoft/sharepointWhen prompted, enter the following values (select the default option for all prompts omitted below):
- What is your solution name?: cc-formcustomizer-customers
- Which type of client-side component to create?: Extension
- Which type of client-side extension to create? Form Customizer
- What is your Form Customizer name? Customers
- Which template would you like to use?: react
At this point, Yeoman installs the required dependencies and scaffolds the solution files along with the HelloWorld extension. This might take a few minutes.
Debug Form customizer extension
- Open the serve.json file located under config folder and update the pageUrl and RootFolder
pageUrl
Site URL of the Customers list
RootFolder
Relative path of the Customers list
After the changes, your serve.json should look like the following code:
{ |
- You can see multiple configurations that can be used to debug new, edit and view forms with specific query parameter differences. You can define the used configuration in your gulp serve command, for example as
console gulp serve --config=Customers_EditForm
This will start your default browser and load the page defined in serve.json file. - Accept the loading of debug manifests by selecting Load debug scripts when prompted.
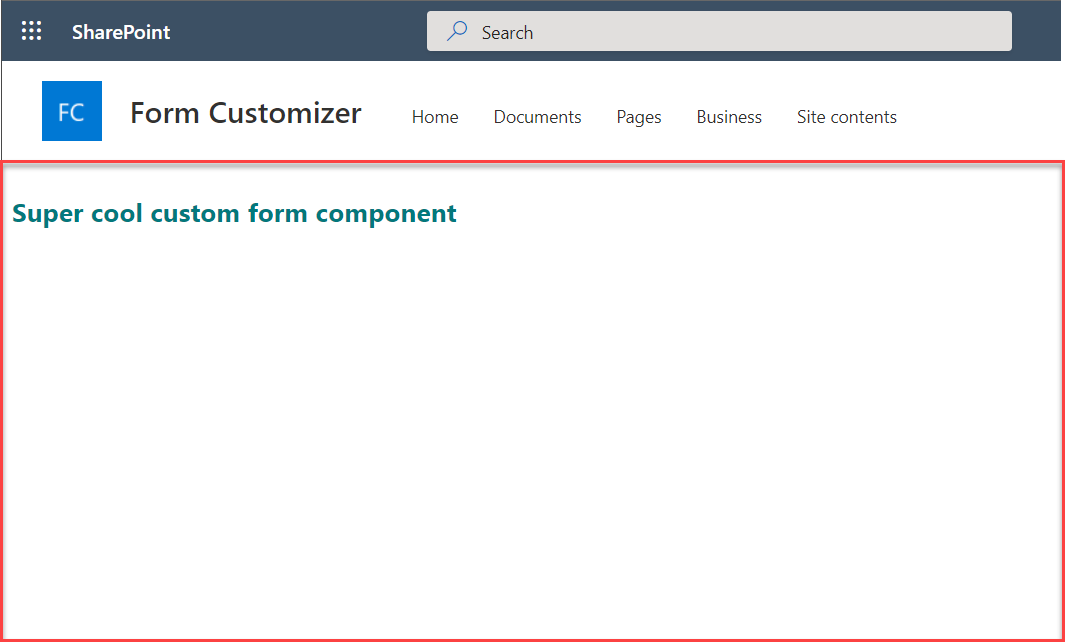
- This is an initial rendering of SPFx form customizer. You will have the entire canvas below highlighted in red to create custom list forms. You can build a custom list form experience for the following display modes
- New Form
- Edit Form
- View Form

Custom List Forms Experience
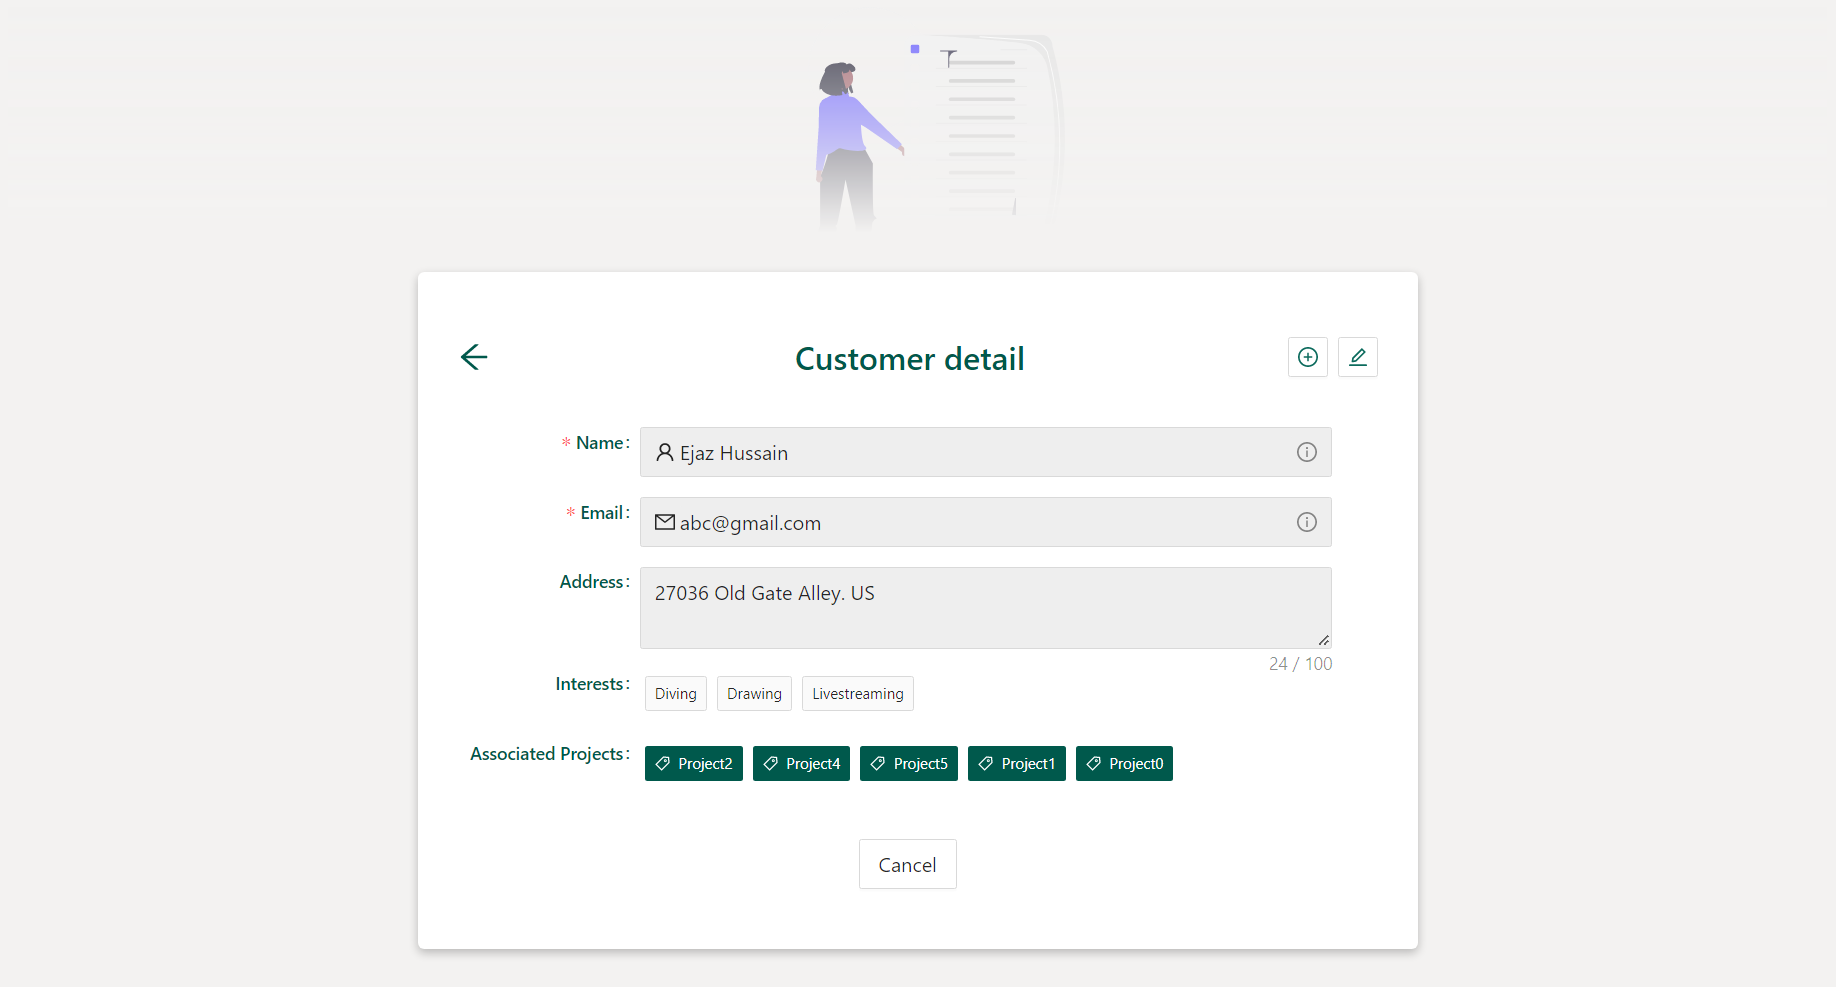
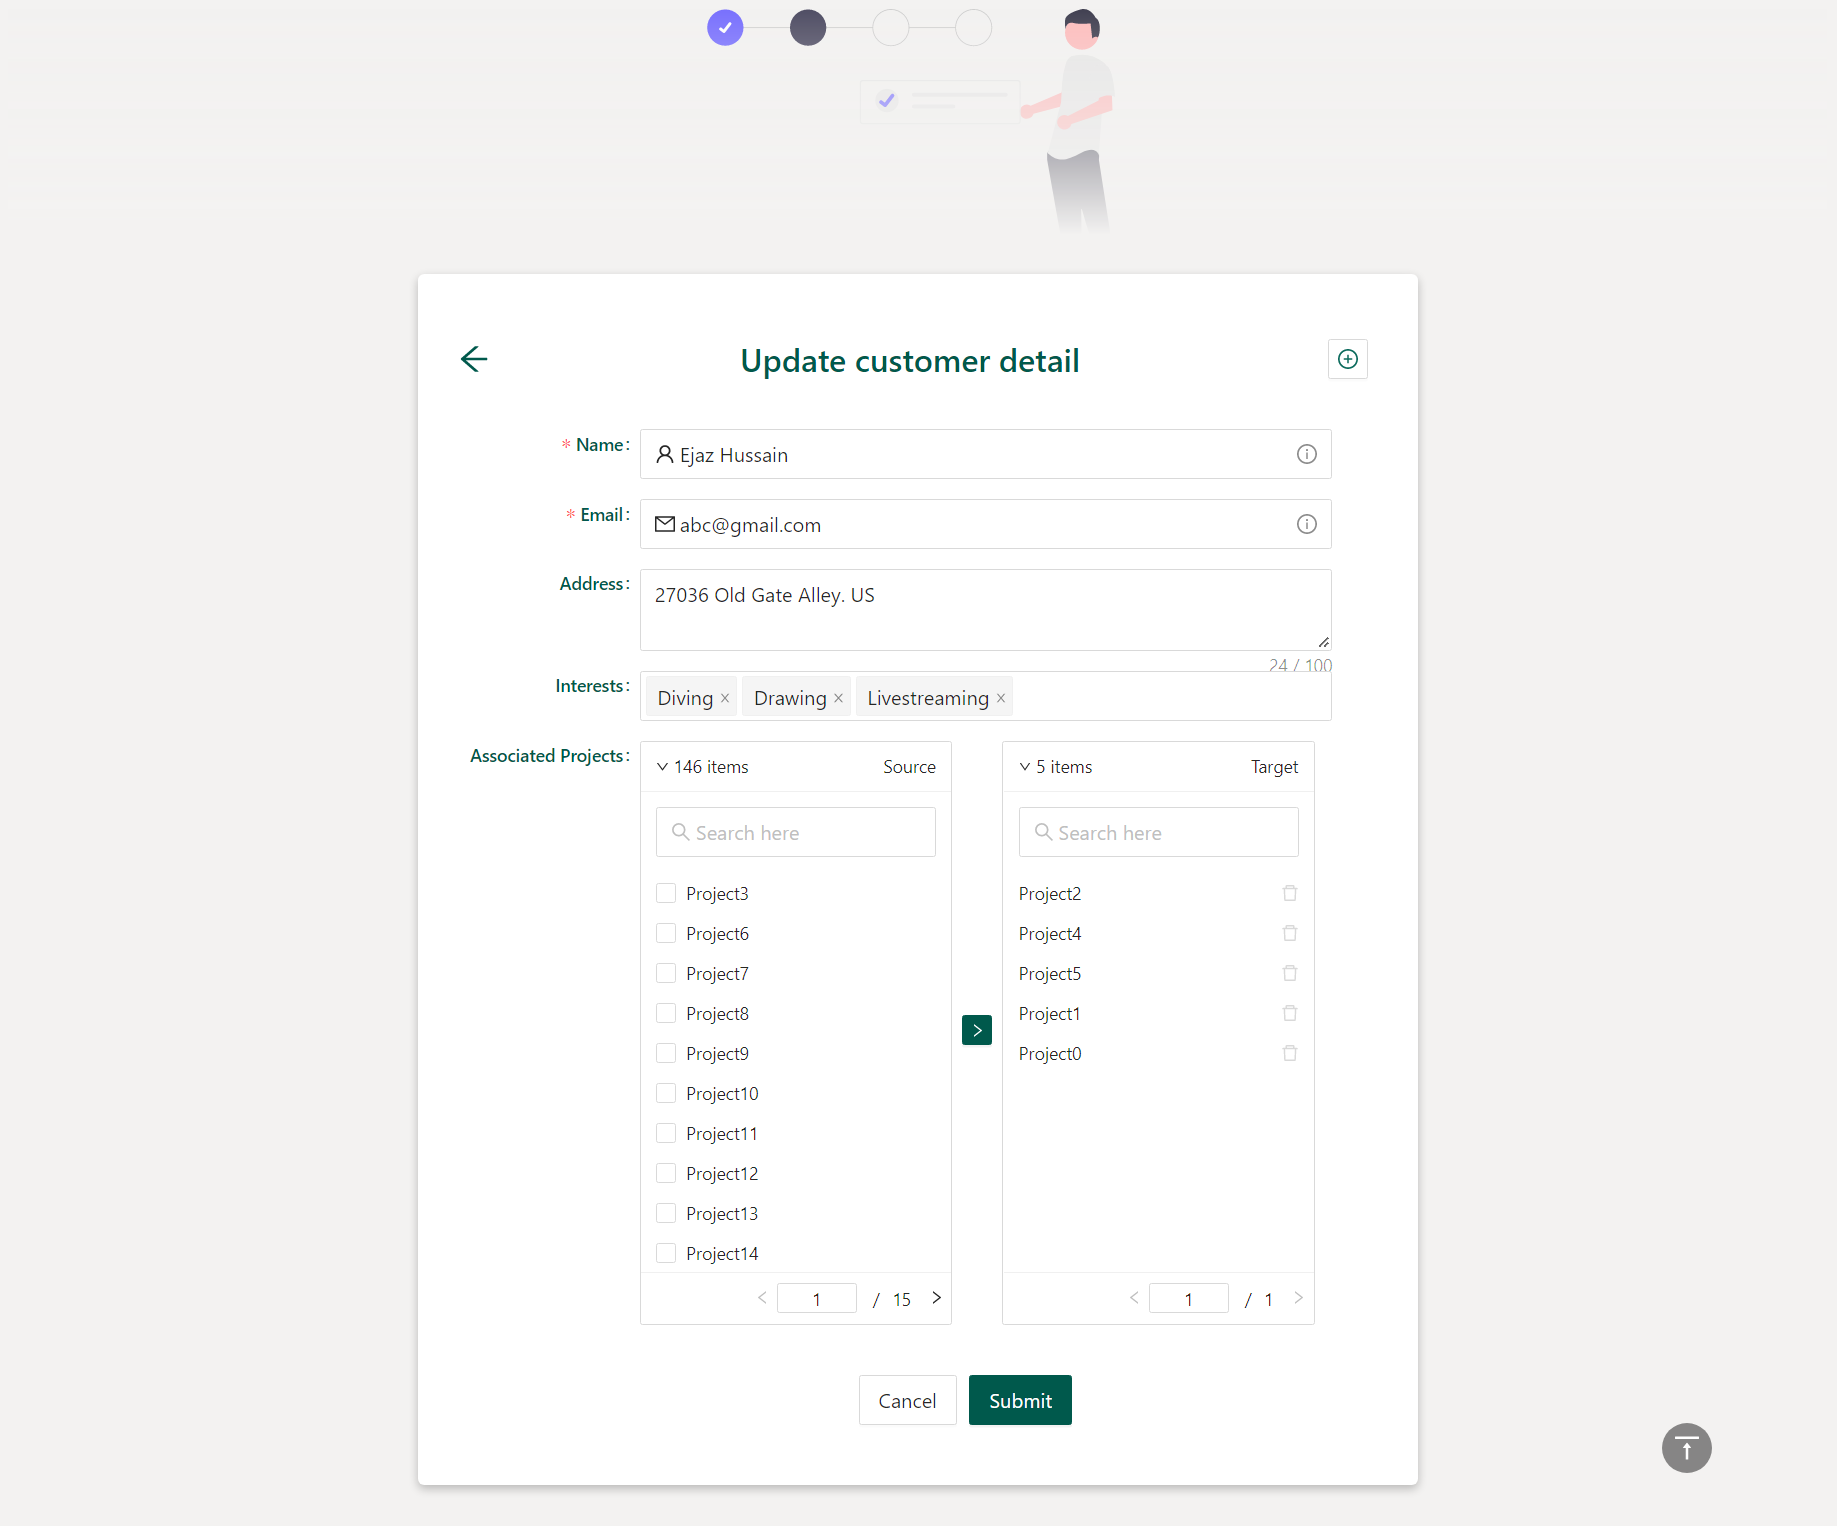
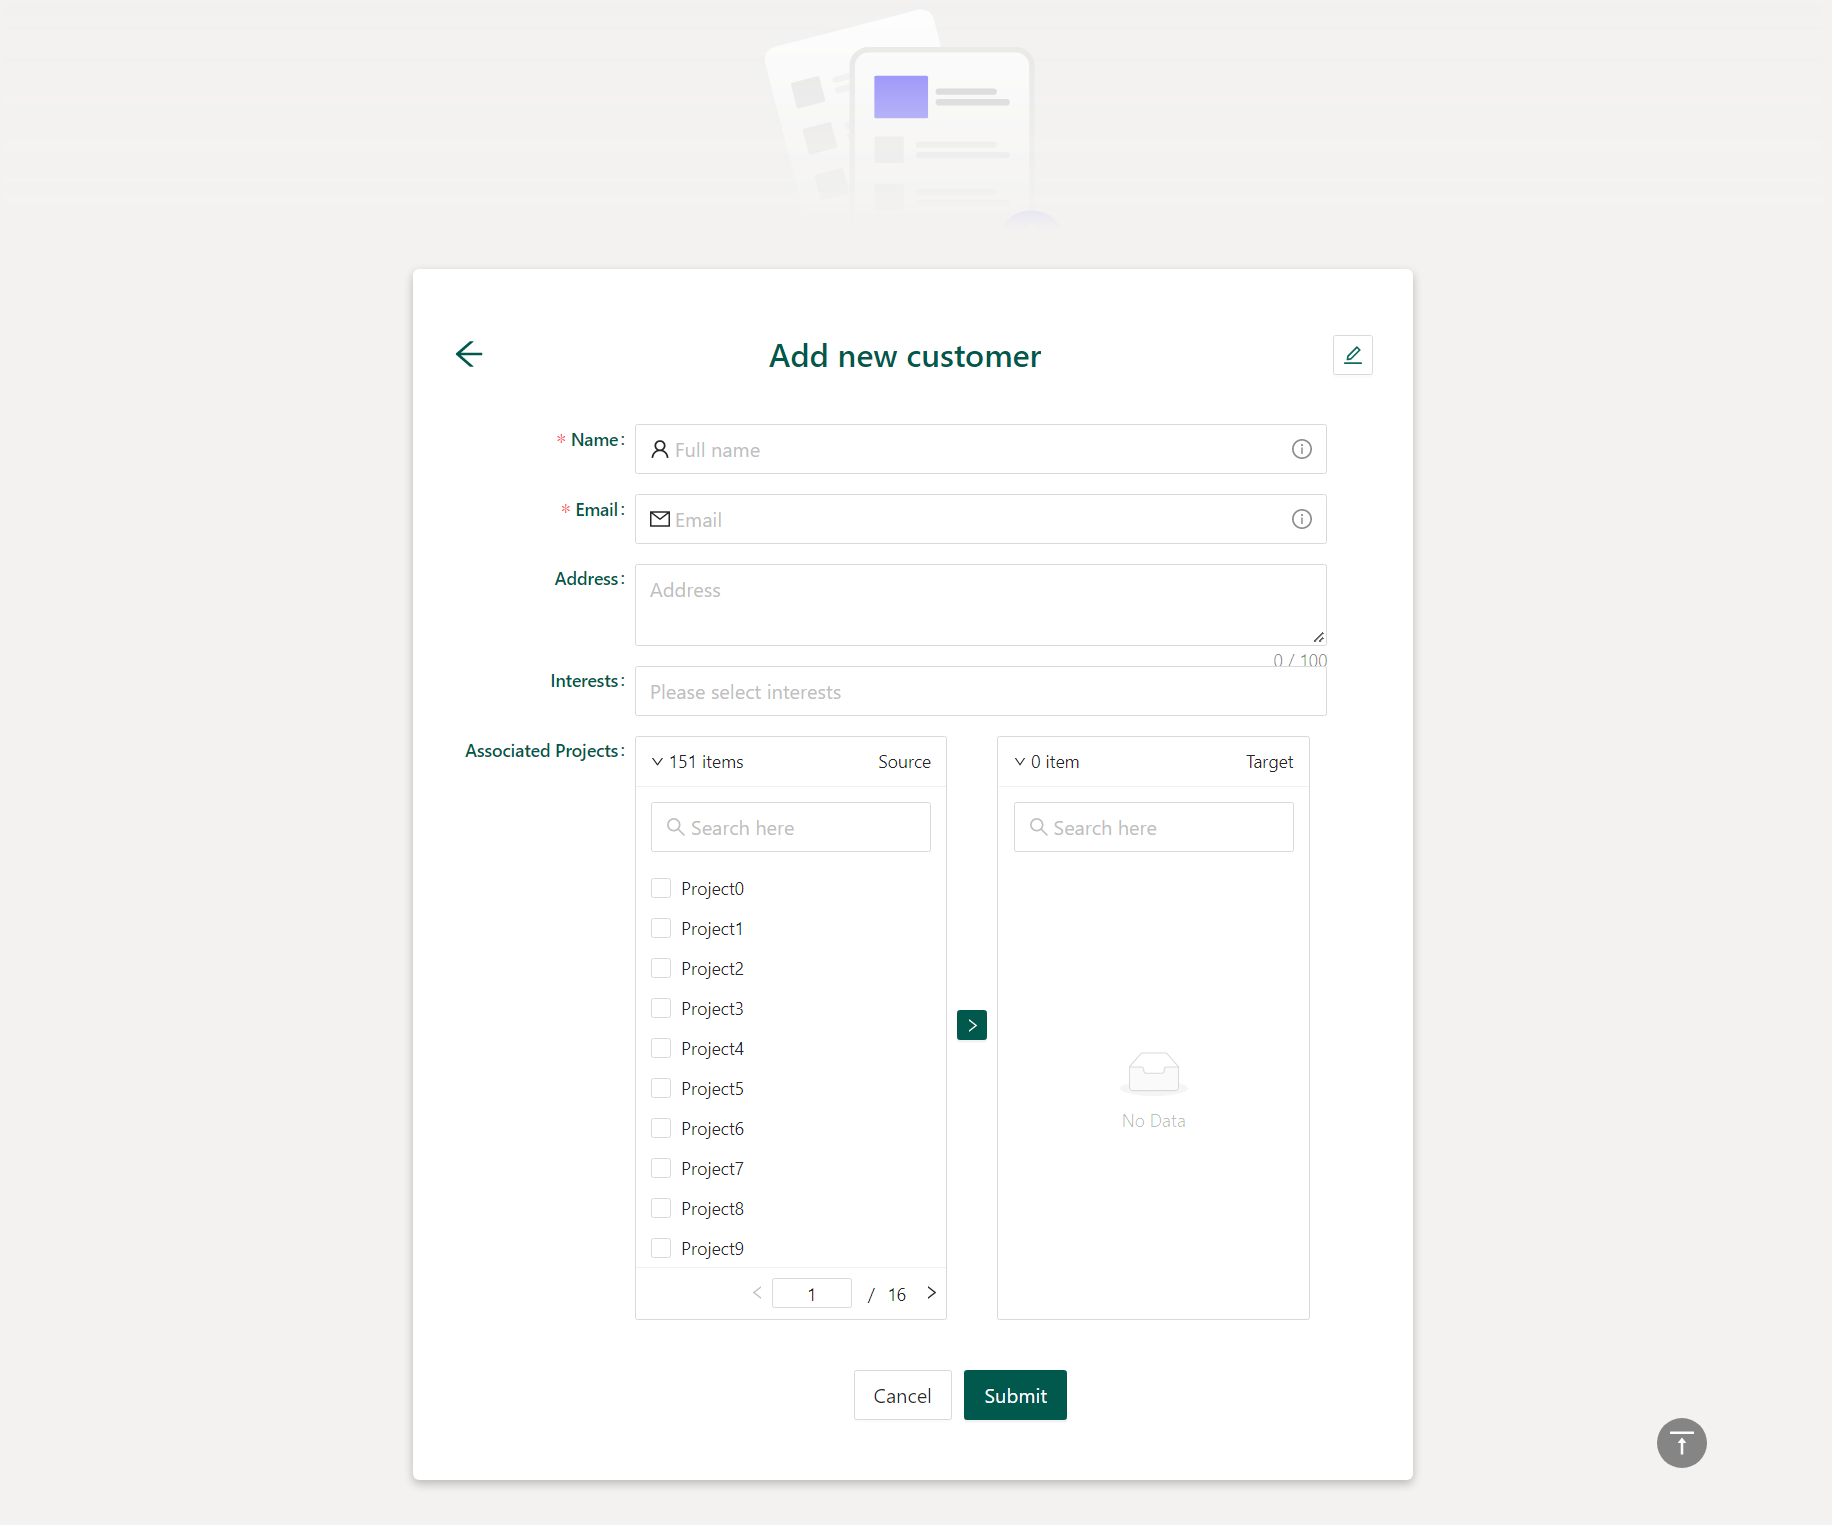
I have created the following custom list forms experience to overcome some limitations we had with the OOTB list experience. For examples
- Lookup Column
Selecting items from the extensive lookup list - Conditionally show fields
Showing or hiding fields based on form logic
Tip
You can find the complete source code from GitHub.
- View List Form

- Edit List Form

- New List Form

Deploy Form Customizer Extension
A few steps are related to the component associated with the content type. The steps for deployment are as follows:
Deploy the solution to SharePoint App Catalog
Install a solution to the site collection where you want to use the extension if you are not using the tenant scoped deployment
Associate the custom component to the content type using the specific properties in the ContentType object. There are two options
- Associate component to content type using REST or CSOM APIs.
- You can provision the used list and content type from your solution if you are using site scoped deployment option
Here is a CSOM code to assoicate component to content type. You will be updating the following three properties of the content type. You can get the componentId from serve.json file
- NewFormClientSideComponentId
- EditFormClientSideComponentId
- DisplayFormClientSideComponentId
try |
