In this blog post, you will learn:
- What are Microsoft Graph connectors and how they work
- What are the benefits and limitations of using Microsoft Graph connectors
- How to choose between using out-of-the-box connectors or building custom connectors
- How to build a custom connector for Microsoft Learn Catalog API
- What are the high-level steps and best practices to create a custom connector
What are Microsoft Graph connectors?
At their core, Microsoft Graph connectors offer a powerful way to:
Connect diverse data sources: Bridge the gap between your external data silos and Microsoft 365, including SharePoint, Teams, and Outlook.
Fuel Microsoft Search: Make your external data discoverable and searchable within Microsoft Search, enhancing knowledge accessibility for your users.
Boost intelligent experiences: Power intelligent features like Context IQ in Outlook and Microsoft 365 Copilot with insights from your external data.
There are two types of connectors: out-of-the-box connectors and custom connectors. Out-of-the-box connectors are pre-built connectors for common data sources, such as SharePoint, Azure DevOps, Azure SQL, and more. Custom connectors are connectors that you can build yourself for any data source that is not supported by an out-of-the-box connector.
What are the benefits and limitations of using Microsoft Graph connectors?
While the benefits are undeniable, it’s crucial to consider both sides of the coin:
Benefits:
- Unleash the power of your data: Bring valuable external information into the Microsoft 365 ecosystem, driving better decision-making and richer user experiences.
- Flexibility and customization: Craft connectors tailored to your specific needs, integrating the data sources that matter most to your organization.
- Enhanced search and discovery: Elevate your search experience by making external content readily discoverable through Microsoft Search.
- Streamlined workflows: Eliminate data silos and manual data integration, fostering seamless information flow across your organization.
Limitations:
- Development effort: Building custom connectors requires technical expertise and investment in development time and resources.
- Management overhead: Ongoing maintenance and potential updates are necessary to ensure your connectors function optimally.
- Potential quota limitations: Free plans have item and quota limitations, which might require paid upgrades for larger data volumes.
How to choose between using out-of-the-box connectors or building custom connectors?
Microsoft offers a multitude of pre-built connectors for popular data sources. However, when your specific needs lie beyond these offerings, custom connectors become your knight in shining armor. Let’s compare the two approaches:
| Feature | Out-of-the-Box Connectors | Custom Connectors |
|---|---|---|
| Ease of use | Plug-and-play, minimal configuration | Requires development effort and technical expertise |
| Flexibility | Limited to pre-built integrations | Tailored to your specific data sources and needs |
| Control and customization | Limited customization options | Full control over data schema, ingestion, and search configuration |
| Maintenance | Managed by Microsoft | Requires ongoing maintenance and potential updates |
Ultimately, the choice between out-of-the-box and custom connectors boils down to your specific requirements and resources. If your data source isn’t readily available and customization is paramount, custom connectors pave the way for a truly integrated and insightful experience.
How to build a custom connector for Microsoft Learn Catalog API using Azure functions (C# .NET)?
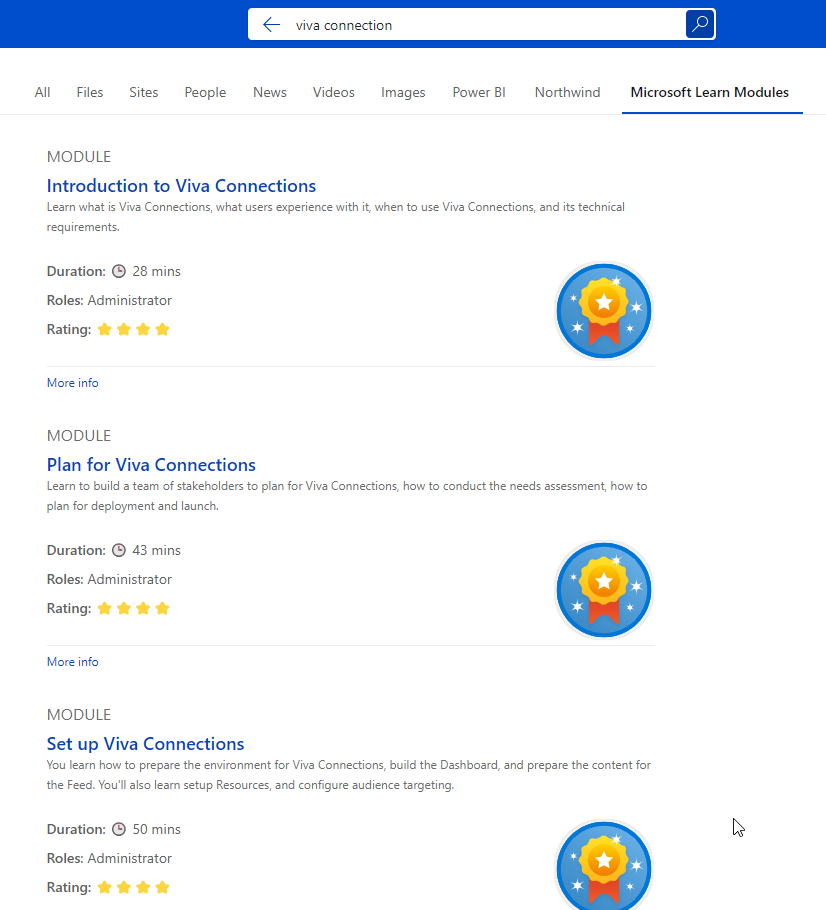
Microsoft Learn Catalog API is a REST-based Web API that lets you query Microsoft Learn and get back details about the available training content and certification exams, such as titles, products covered, levels, links to training, and other metadata. You can use this API to create a custom connector for Microsoft Graph that will enable you to search and discover Microsoft Learn content from Microsoft 365.
High-Level Steps:
Define your connection and schema: Specify the connection details (name, description, data source type) and design the schema for your data (properties, types, display options).
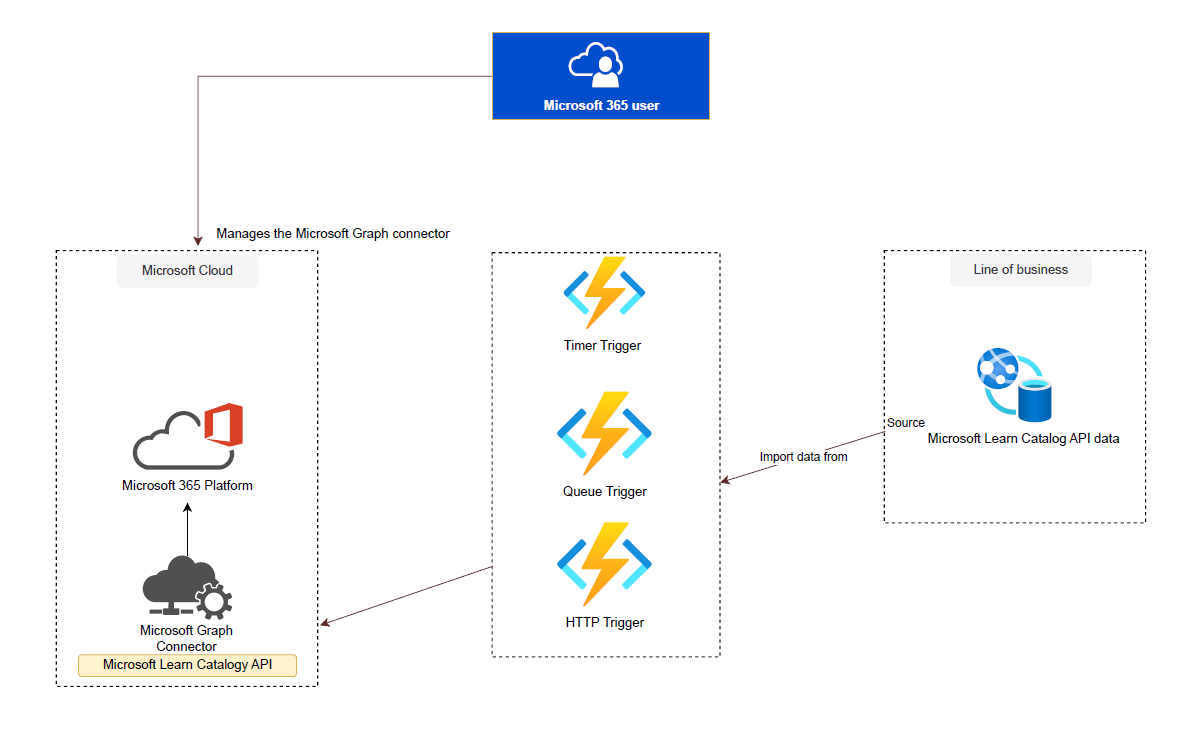
Develop Azure functions: Implement Azure functions to handle different data ingestion scenarios. In this case, we’ll create functions for:
- QueueContent: Processes messages from a queue containing information about the triggered action.
- TimerContent: Runs daily to fetch all learning modules and ingest them into the SharePoint Online search.
- OnDemandContent: Provides manual triggering for data ingestion.


- Configure search settings: Define how your data will be displayed and ranked in Microsoft Search, including display templates, result types, verticals, and refiners.
- Deploy and monitor: Deploy your connector and monitor its performance and health to ensure smooth data flow and optimal search results.
Conclusion
Microsoft Graph connectors are a powerful way to connect your external data sources to Microsoft Graph and enhance the Microsoft 365 experience with your own data and insights. You can use out-of-the-box connectors for common data sources or build custom connectors for any data source that is not supported by an out-of-the-box connector. In this blog post, you learned how to build a custom connector for Microsoft Learn Catalog API using C# .NET Azure functions and how to register, configure, ingest, test, and monitor your custom connector in Microsoft Graph.
I hope you found this blog post helpful and informative. If you have any questions or feedback, please leave a comment below or contact me at LinkedIn or Twitter. Thank you for reading and happy coding!
Source code
Note
You can find the complete source code from GitHub.
